Very often artists struggle to get their cards up on the most popular pages due to timing issues. Remember to plan early. We suggest you upload your ecards 30 days before the event. For example, if you’re doing an ecard for Halloween your ecard should be done by October 1. This way, you have lead time to market your ecard. Your ecard will be listed in our site, and indexed by the search engines. Ecards should not be uploaded less than 7 days to the event.
Another area to look into is our upload options. New artists may wonder which one of our upload options to use. We’ll tell you how the two options differ so you can decide which one suits you the best.
With 123Greetings Studio, you can now upload your ecard in a few simple steps:
1. Sign in to Studio with your account
2. Go to “My Cards” tab and choose the way you want to upload your ecard
You could either select the “Easy Upload” or the “Advanced Upload” option. Though the “Easy Upload” option is simple and easy-to-use, the “Advanced Upload” option offers greater options for customization.
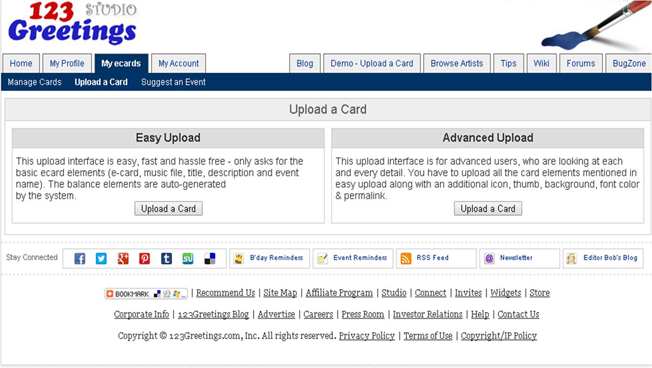
Easy Upload
This upload interface is easy, fast and hassle free. It only asks for the basic card elements (ecard, music
file, title, description and category). Under this option our system determines the Thumbnail, Icon and Permalink to be displayed.
Follow these steps to upload your ecard using the ‘Easy Upload’ interface:
- Select the Event or Category under which you would like to place your ecard. Be as specific as you can.
- Browse and select the card file that you want to upload.
- In case your ecard is a postcard or an animated card you may attach a music file to it. Browse and select the music file that you want to upload. Music is optional. (A flash ecard must have music embedded in it, so there is no need of a separate music file for it.)
- Put a relevant card title. For example: “Just dropping by to say hi” can be a suitable title for an ecard that will be in the “Everyday: Hi” category.
- Add a description for your ecard. Using apt key words makes it easier for people to find your ecard in their search results.
- Click on the submit button to get your ecard listed on the site.
- If you opt not to submit your ecard for listing and want to save it as draft, click on the “Save as Draft” button.
Note: Once you upload your ecard (in Easy Upload), the Icon, Thumb file and the permalink of your ecard
are auto-generated by the system. The default background and font color of your ecard remains as
white and black respectively. If you save your ecard as draft, all these elements can be further
customized in the ‘Edit a Card’ section.
Advanced Upload
This upload interface lets you customize all the card elements in detail. You can upload your own icon or thumb for your ecard, customize the permalink of your ecard, choose the color of the font in which the sender’s personal messages would appear, add tags and also select your own background for your card. These are important for your card’s popularity and indexing by internal and external third party search engines, which drive traffic to your card.
Here are the steps:
- Select the Event or Category under which you would like to place your ecard. Be as specific as you can.
- Browse and select the card file that you want to upload.
- In case your ecard is a postcard or an animated card you may attach a music file to it. Browse and select the music file that you want to upload. Music is optional. (A flash ecard must have music embedded in it, so there is no need of a separate music file for it.)
- Browse and select the icon file of your ecard.
- Browse and select the thumb file of your ecard.
- You could also use the auto-generated icon and thumb for your ecard by selecting the“Want to recreate icon and thumb” option.
- Put a relevant card title. For example: “Just dropping by to say hi” can be a suitable title for an ecard that will be in the “Everyday: Hi” category.
- Add a description for your ecard. Using apt key words makes it easier for people to find your ecard in their search results.
- You may customize the permalink of your ecard or choose to use the auto-generated one (which is derived from your title). While suggesting a permalink try to use relevant keywords so that it becomes search friendly.
- Choose a font color that will be used to display the custom user messages. The font color should compliment your ecard color scheme. The default font color would be black.
- Add tags to your ecard. You could use keywords that did not figure in your title or description, but are closely related to your ecard. Tags can be for the card elements/visual objects, potential senders, potential receivers, emotions shown in the card.
- Browse and select the background file of your ecard. This is optional. The default background would be white.
- Click on the submit button to get your ecard listed on the site.
- If you opt not to submit your ecard for listing and wish to save it as draft, click on the “Save as Draft.”
These two options provide artists with the flexibility to upload cards in their preferable way and take control of card elements such as thumb, music etc.